Alex's quick reference guide

Brief articles on hiking, backpacking, and adventure travel.

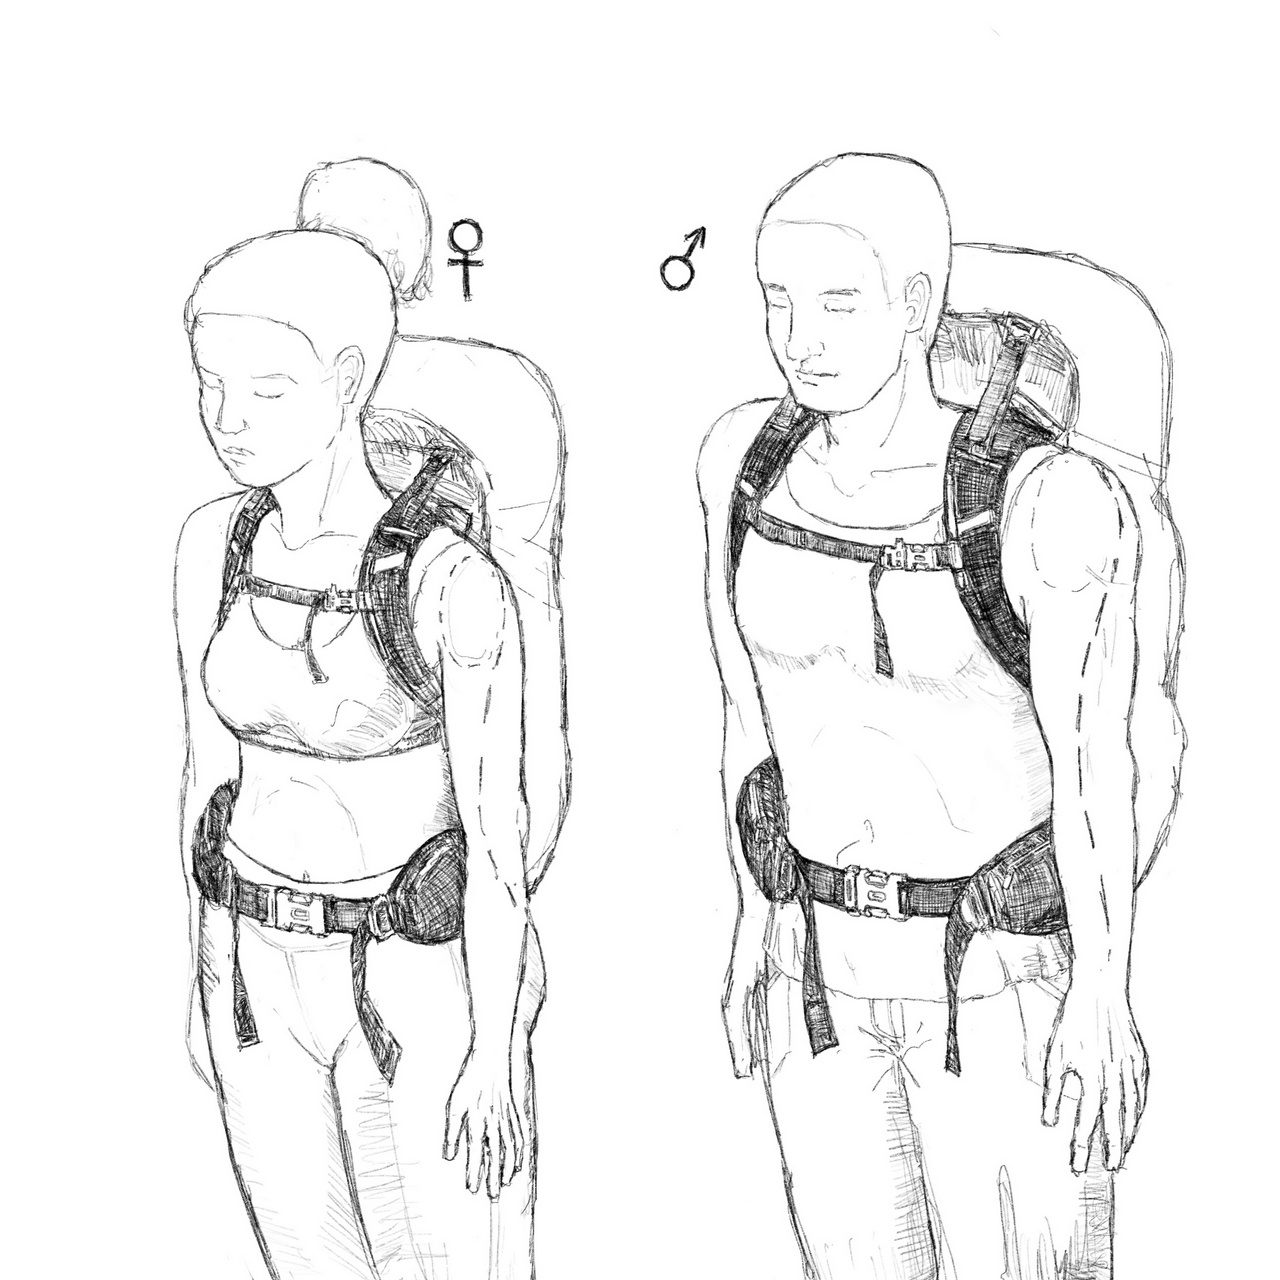
  1. They have shorter, narrower, more S-shaped curved shoulder straps.
  2. They are shorter. If they have metal frames, the frames are also shorter.
  3. If they have torso height adjustment, the range shifts downwards.
  4. If they have hipbelts, they have more of a canted, flared angle for comfort on wider hips. Diagram of differences between male and female fit on backpacks

Often, “unisex” backpacks don’t work well for the smaller adult women. Usually, women should try on a women’s fit backpack first, before trying unisex or men’s fit options. If women’s specific fit models are not available, try Osprey unisex fit. However, regardless of your sex or gender, go with whichever backpack model is most comfortable for you.

Note on trans-inclusivity: the manufacturers continue to label these as “men’s” and “women’s” backpacks, though they really mean AMAB and AFAB. You should generally start with trying on a backpack with the fit that is closest to your assigned sex at birth. If you are a physically very small person, and AFAB/women’s fit backpacks are not available, Osprey usually designs the best true unisex fit for such people.

Note on size-inclusivity: if you are on the bigger side, Gregory offers more generous sizing by default. Additionally, Osprey offers models with “Extended Fit,” denoted by an “EF” on the model name, and Gregory offers “Plus Size” models.

For many manufacturers, “unisex” means the backpack was designed for larger adult men. They may work acceptably well for some average-sized or larger women, but smaller women are out of luck.

The following manufacturers may fit poorly on smaller women:

  1. MEC (unfortunately, true for all of their current hiking and travel backpack models, even the models with low capacity)
  2. Gregory (hiking models)
  3. Fjällräven
  4. The North Face (fortunately, they offer women’s-fit equivalents of most of their school/office backpacks)
  5. Most other brands

The following manufacturers’ “unisex” models fit well on smaller women:

  1. MEC (specifically their current generation school/office backpacks, the Campus and Hippocampus have well-designed shoulder harnesses and back panels for a very wide range of body shapes and sizes)
  2. Osprey
  3. Gregory (school/office models)
  4. Patagonia

Sometimes, the opposite problem occurs, as some men have such long torsos (especially those taller than 180cm / 6’ and those with torso lengths greater than 55cm / 21”) that the shortest unisex backpacks will have unusable waist straps or hipbelts. The legendary MEC Pika Pack basically never had a usable waist strap for nearly any person throughout its multi-decadal history simply because the bag itself isn’t long enough. Most people with longer torso should remove the waist straps from any day hiking, school, or office backpack with a detachable option, such as the previous-generation Gregory Nano 16 or the Osprey Daylite 13.

Manufacturers that are normally out of range for very small women can sometimes accidentally make a comfortable model by virtue of the backpack itself being physically very small, such as the Gregory Nano 16 or the Fjällräven Skule 20. By this logic, an Osprey Daylite 13 will fit better on the physically smallest adults better than the Osprey Daylite Plus 20, and likewise with the Osprey Hikelite 18 versus the Hikelite 26.

Men with very long torsos are probably going to have to a much better time wearing men’s specific fit backpacks, such as the Osprey Talon (sorry about the price).

Most of the time, I'm not sure.

You'll see a lot of backpacks that are suspiciously compact for their rated capacity. To my knowledge, there is no law, regulation, or industry standard anywhere in the world that requires a truthful statement of capacity. There is a testing standard, known as ASTM F2153-07(2018), but it’s not mandated by any government.

A tiny number of manufacturers will perform this test. But Mystery Ranch has quit the civilian market, and I can’t think of any larger manufacturers that might provide verified capacity for all of their pack products. Smaller companies do: Evergoods and Tom Bihn come to mind. Two photography-specific backpack designers also always have honest specifications: Lowepro and Think Tank.

Otherwise, for most manufacturers, the capacity stated in the model name or the specifications should be considered illustrative of the design intent, and not the true capacity. The real capacity is probably between 5% to 30% lower than the implied capacity in the model name or listed specification.

The method for measuring capacity is to fill a bag with ping-pong balls, then pour the balls into a cylindrical container with marked capacity indicators. However, by overstuffing all the pockets, and cramming as many balls as possible into the open-topped mesh water bottle pockets, sometimes manufacturers end up giving an inflated specification.

Even worse, sometimes they will measure according to a simple multiplication of the linear dimensions (L x W x H) and wildly overstate the capacity. Even trusted companies like Osprey will do this occasionally! It is very difficult for most people to verify manufacturers’ claims, because having most people don’t have 100L of ping-pong balls and a giant plastic cylinder kicking around at home.

Sometimes it's the opposite, and the capacity may be overstated. However, this situation is extremely rare, and to my knowledge, of the most popular models only the Cotopaxi Allpa 35 and 42 are like this (to their detriment, because it will no longer fit in the carry-on sizer when filled to its true capacity).

The good news is that most travel backpacks are, by virtue of their rectilinear designs, easy to calculate the likely capacity of. The Patagonia Black Hole MLC 45 is almost certainly really 45L, the MEC Outpost 30 and Patagonia Black Hole Mini MLC 30 almost certainly 30L, and so on (This is also how we know the very popular, affordable, and versatile Osprey Daylite Carry-On Expandable 26+6 is really closer to 20 litres + 4 litres). Alpine-style backpacks with large extension collars and floating top lids can also be easily overstuffed beyond its rated capacity.

Some backpack designs reduce practically usable volume in a way that cannot be attributed to deception or carelessness. This usually happens with backpacks with metal frames that have a 3D curvature, especially those with trampoline-style ventilation harness systems. The volume in the extreme corners is essentially ‘lost’ because flat, rigid items will block those spaces off.

Conversely, this makes trampoline back panels less desirable for air travel or for any situation where capacity needs to be maximized in a restricted rectilinear space (such as in a car's trunk, or under the airplane seat). Trampoline back panels, combined with the ergonomically curved shape of the packbag, will mean that a pack with a low capacity tends to have a large rectilinear footprint.

In sum, the listed capacity in the model name or the spec sheet is more indicative of a backpack's design goals and intended use case, rather than the true capacity. Therefore, the rest of this guide takes the model name's suggested litre capacity at face-value but when there's some serious chicanery involved I will do my best to note it. The North Face can't keep getting away with this!
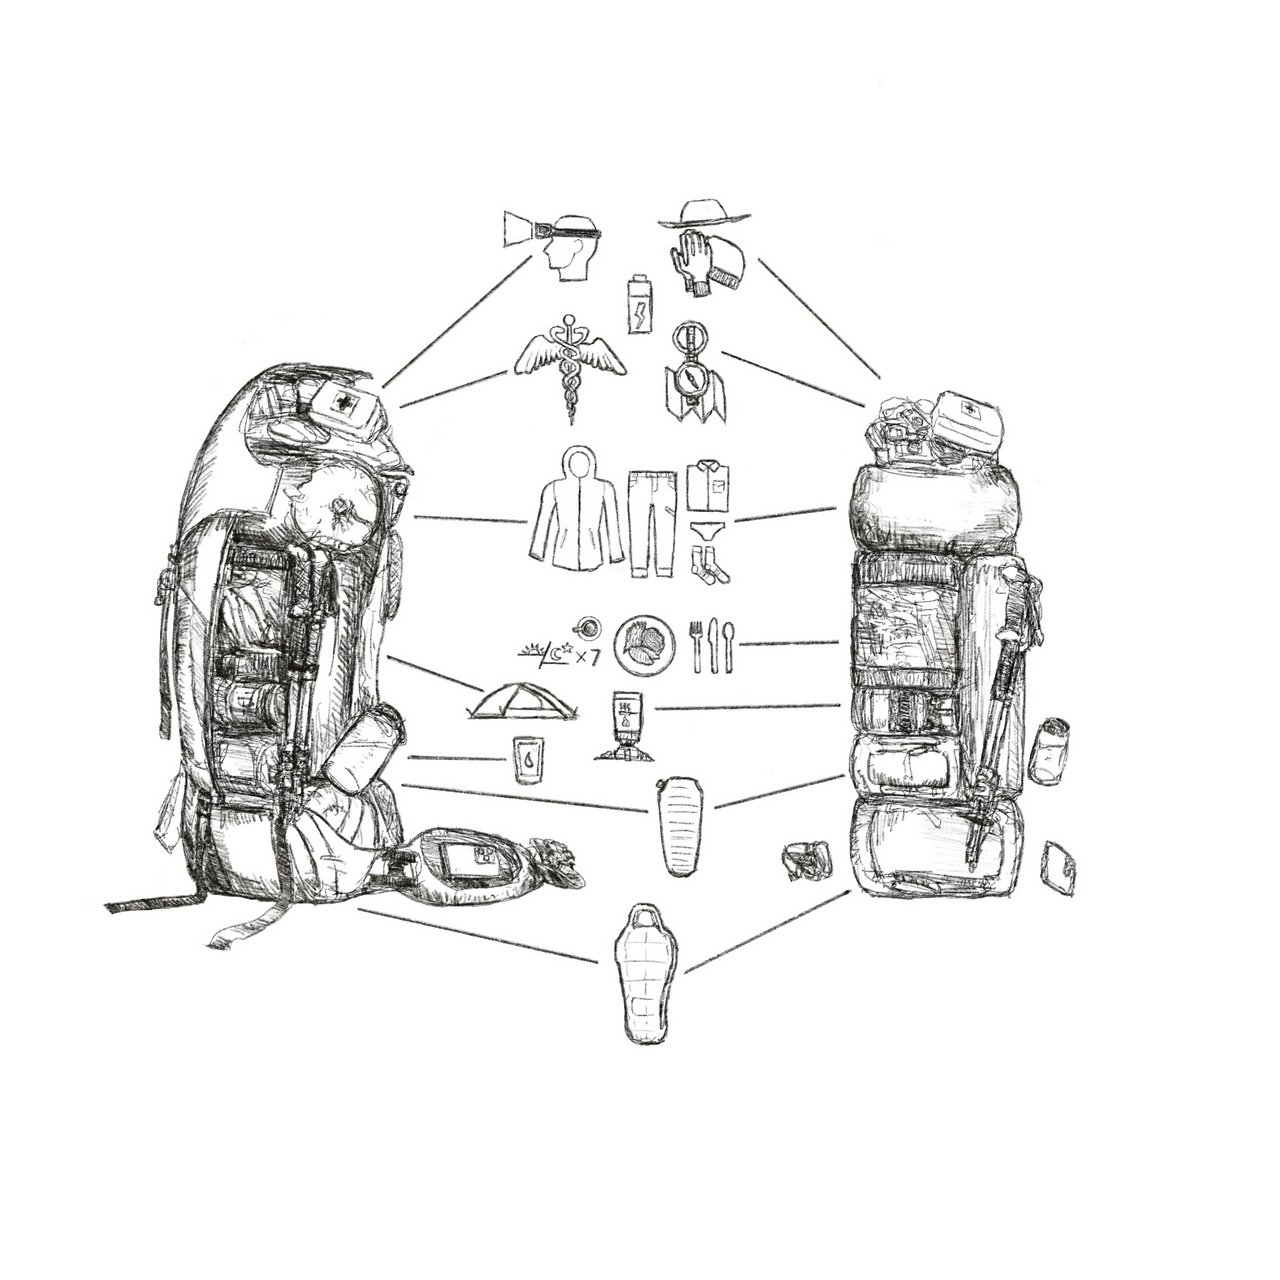
cutaway of a backpack packed for a backcountry trip Many alpine-style backpacks only have an alpine top lid opening, and no main zippered opening. There are many reasons for this design feature:
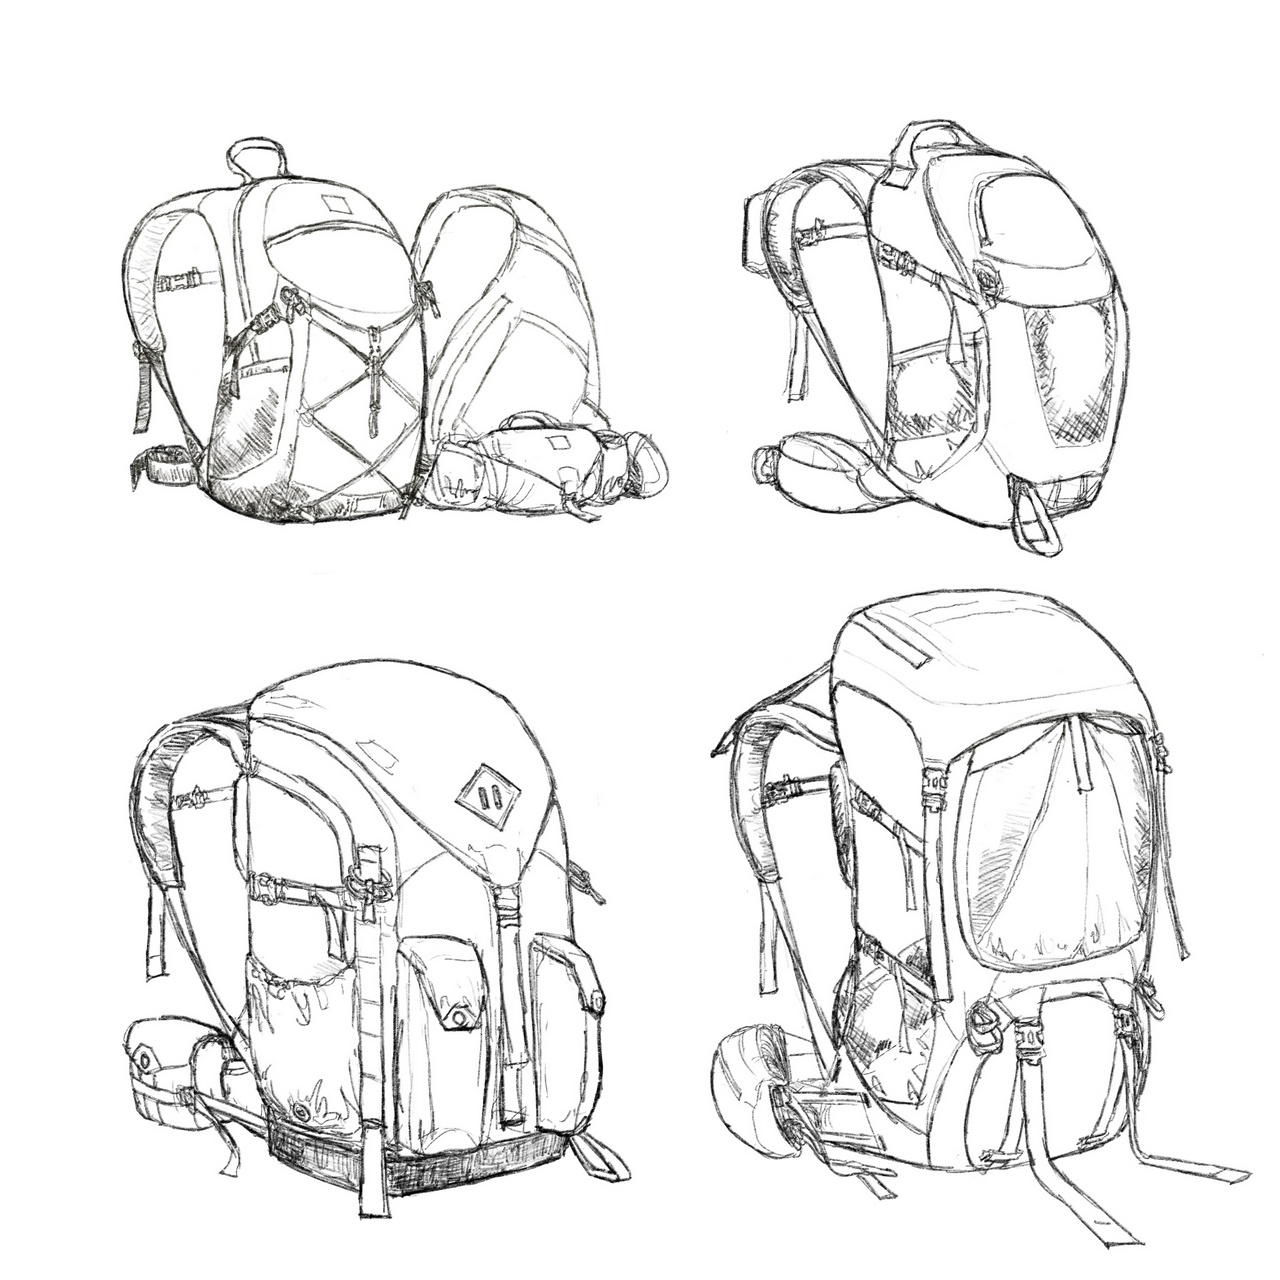
  1. A zipper blowout in the mountains could be disastrous.
  2. Top loading designs are inherently more weather-resistant and durable than a zippered opening.
  3. Every day should have the same order of operations:
  • When you arrive at your campsite, begin setting up camp. Pull out your clothing sack, food bag, stove, and fuel, and set them aside.
  • Set up your tent.
  • Inflate your sleeping pad and lay it down.
  • Pull your sleeping bag out of its compression sack and lay it down.
  • Cook and eat your dinner.
  • Finish cleanup duties and retire for the evening.

The next morning is something like this in the reverse order:

  • Cook your breakfast and brew your coffee.
  • Break camp. Pack your sleeping bag and put it into the bottom of your pack.
  • Deflate your sleeping pad and pack it above the sleeping bag (or if it’s a closed-cell foam pad, strap it to the bottom of your pack).
  • Collapse your tent and stow it in your pack.
  • Clean and store your stove, cookware, and utensils and place it next to your tent along with your fuel and food bag.
  • Place the clothing bag on top, close your pack, and re-engage all your compression straps. Start hitting the trail.

The sleeping bag should always be stored at the bottom for this reason. Therefore, a panel zipper is usually not needed. Since everything comes in and out of the backpack in the same order every day, there shouldn’t be much rummaging around. Modern designs have convenient pockets (usually, at least two hipbelt pockets) for quick-access items to prevent the need for digging around. Since reaching the bottom of the packbag can be cumbersome, most modern designs include a large, zippered bottom opening for convenient access to the sleeping bag.

The main use of the panel or side zipper is to get at smaller items that have shifted and sunk into the middle of the packbag throughout the hike. Alternatively, you may pack something intentionally in the centre of your pack, but wish to pull it out in the middle of the hike (e.g. a camera cube).

A large, zippered panel opening can also be convenient for non-backcountry use, if there is no ‘big four’ because you’re hiking hut-to-hut, or as a substitute for a travel backpack in urban environments. For hut-to-hut treks, I would usually recommend single, large packing cube with a grab handle, which you can pull out easily when you arrive at your accommodations.

Otherwise, packing your bag as suggested above ensures that your weight distribution is optimized. Heavier, denser items should be stored closer to your centre-of-gravity, and the lighter, bulkier items stores further from your centre-of gravity (see the illustration at the top). The lightest thing of all would be a closed-cell foam sleeping pad, which should always be strapped externally with the bottom sleeping pad straps. Some exceptions should be made for important items that may need to be accessed quickly, such your water bottle(s), first aid kit, or bear spray.

backpack capacity range categories 5L → 15L: summer day hikes, ½-day hikes. 15L → 30L: 3-season day hikes. 28L → 45L: winter day hikes, summer overnights, hut-to-hut. 50L → 70L: 3-season backpacking (4-7 days), winter backpacking (2-3 days), thru-hiking. 75L → 95L: backpacking with young children, winter/expedition backpacking, professional guide work.
By the way, hut-to-hut hiking means any backcountry hiking that does not require the Big Four, because you will be sleeping in roofed accommodation every night. Examples include the Camino (though some routes have little or no backcountry sections), the Sunshine Coast Trail, or the Tour du Mont Blanc. The Bruce Trail is a strange example that stands on its own; consult the Bruce Trail Reference Guide for more information.

These guidelines are also not gospel. If you’re an ultralight fanatic, you don’t need as much capacity. Easy day hikes in the frontcountry don’t require this much capacity. If you have older, cheaper equipment, you may need a lot more capacity.

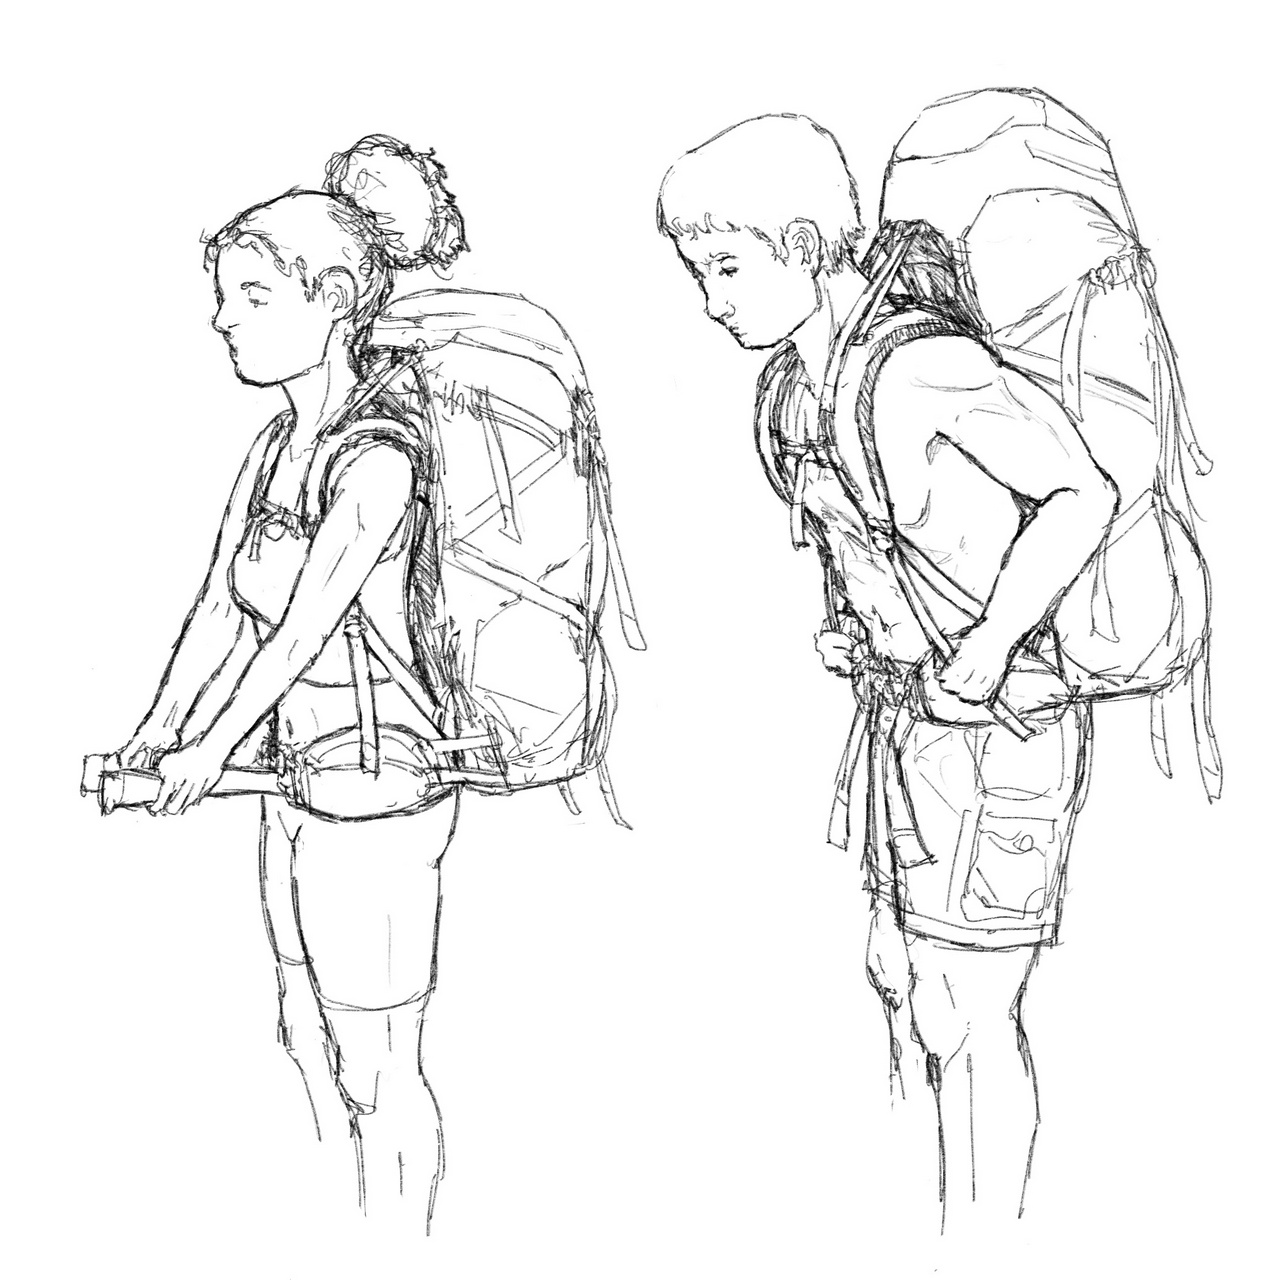
diagram of pack fitting process

It can be difficult to get your backpack to fit perfectly. The best thing to do is to head to your closest MEC, REI, or other outfitter, and have the pack fitting done professionally. Otherwise, here’s what you should be looking for:

  1. The shoulder straps and back panel should sit comfortably and snugly against your shoulders, chest, and pack. If the backpack is the correct size, and the straps are not overtightened, there should be no pinching of the straps, or air gaps between your skin and the backpack.
  2. The sternum strap should have only the smallest amount of tension, as it is not meant to be a load-bearing strap. Its only purpose is to stabilize the shoulder straps and prevent them from sliding off the sides. The height adjustment should be midway between bottom of the collar bone and the widest part of your chest. Some variation is acceptable. If this is backpack with no hipbelt (so, most office/school backpacks), you can ignore the remaining steps.
  3. The hipbelt is in the most important part. Ideally, the middle of the padding should cover the top of the hipbone (specifically, the highest point of the pelvis, the iliac crest). It should be tightened as much as possible without causing pain. For most people, this means the buckle will close slightly (2-3cm, 1-1½”) below the navel, or where the button would be on a pair of mid-rise jeans. The goal is to achieve 70% weight distribution on the hips and 30% on the back and shoulders. Higher ratios are fine, as long as the backpack is not sitting too loosely that it starts to sway on your body. If this ratio cannot be achieved, 55%/45% is acceptable. If you have an extreme hip-to-waist ratio, congratulations! But, the downside is that some hipbelts with ride up, even when loaded with weight. If this applies to you, try to keep the hipbelt as low as possible, and adjust it as best you can.
  4. If there are load lifters, they should be pulled until they stabilize the load near the top of the packbag, without becoming uncomfortable. The exact angle will be different on different models, due to the large range of possible frame lengths, but in general it should never feel so tight that it starts putting pressure back on the chest.
  5. Most framed hiking backpacks, especially those with more than 30L of capacity, will have an adjustable torso length. The exact mechanism varies by model, but most common is breaking the contact between Velcro panel that the shoulder straps are connected to and the rest of the backpack and sliding it into a new position. Change the torso length if all other adjustments don’t get you to the right fit. If it still doesn’t fit, either try a different size of the same backpack if multiple sizes are available. Finally, try a different model altogether.
  6. If following this fitting process doesn’t feel comfortable, do whatever feels the most natural. In all cases where your comfort conflicts with the standard fitting advice, what feels the most right to you overrides any textbook instruction.

There are many useful guides online, but it can be difficult to get an accurate measurement without the tool that Osprey and Gregory hand out to retailers. I usually don’t bother because the length indication marks on the backpacks themselves don’t have numbers on them. To complicate things further, each manufacturer has its own sizing system that doesn't fully match up with others (at least they all have detailed instructions if you want to measure your exact torso length).

So what to do? Start here:

Osprey men’s packs run small in their small and medium sizes, and true-to-size in their large and extra-large sizes, when compared to their equivalent clothing size. Their women’s packs run small across the entire scale.

Gregory men’s packs run true-to-size compared to their equivalent clothing size. Their size markings are based on a single unisex scale (XS, S, M, and L), so there is no extra-small size for men, and no large size for women. Gregory packs have more generous sizing overall, but that means the smallest women may not be able to maintain tension on the hipbelt. If that's you, XS (or the combined XS-S sizing) will likely be the best option.

Deuter generally takes a one-size-fits-all approach with universal adjustment, the standard model being men’s fit, and model names appended with “SL” are women’s fit.

Fjällräven surprisingly does have marked length indicators in centimetres. “Small/Medium” is intended for women’s fit, and “Medium/Large” is intended for men’s fit. However, Small/Medium Fjallraven packs run large for smaller women, and if that's you, I recommend retracting the torso length to the minimum level.

Black Diamond runs small.

Most other manufacturers are wildly inconsistent. If you’re unsure, talk to the people at your local REI, MEC, or other outfitter to walk you through the fitting process.

  1. Start with a women’s pack for most women, and a unisex or men’s pack for most men.
  2. If multiple sizes are available, choose smaller size options for shorter people, and larger size options for taller people.
  3. If a torso height adjustment is available, adjust it to your best estimate, if needed.
  4. Adjust the shoulder straps until the hipbelt is in place.
  5. Close the hipbelt around the top of the hips, where the padding covers over the hipbone (the iliac crest of the pelvis). The buckle will close slightly below the belly button for most people. Pull the adjustment straps forwards tightly.
  6. Fine-tune the shoulder strap adjustments until the shoulder straps wrap flush around the entire torso, without pinching or applying too much pressure to the upper body. The test load should now be stable, and 55-70% or more of the weight is resting on the hips.
  7. Adjust the height of the sternum strap height to a comfortable position, if needed. Close it and adjust it until it lies level and with a very small amount of tension.
  8. Pull the load lifter straps until the backpack feels completely stable on the upper back, without causing discomfort or putting pressure on the upper body.
  9. If the backpack doesn’t feel right, try different combinations of adjustments of the shoulder straps and the load lifters until it does.
  10. If the backpack still doesn’t feel right, double-check that the hipbelt is wrapping around the iliac crest, and try changing the torso height if it is adjustable.
  11. If the backpack still doesn’t feel right, try on other backpacks.

Enter your email to subscribe to updates.