Alex's quick reference guide

Brief articles on hiking, backpacking, and adventure travel.

Welcome!

Welcome to Alex’s Quick Reference Guide. This purpose of this website is to help people head out on their adventures in backcountry hiking and urban adventure travel, safely and comfortably (within the bounds of Type 2 fun, of course).

Whenever we look for advice on outdoor adventure, we often find ourselves surrounded by conflicting voices on how to do things, where to go, what to buy.

To help narrow down a bewildering set of choices, I’ve synthesized a combination of historical best practices, trade publication reviews, customer feedback, lessons learned from my own experiences, and lessons generously provided to me by mentors who have logged more nights in the backcountry.

No guarantee is provided here, except these these:

I will never host ads on this page, never draw commission from a sale I made based on the purchase of recommended products, or attain any material benefit from the advice I provide here. There are no affiliate links, and there never will be. There is no link to any social media, and there never will be. I don’t want or need followers, and I don’t solicit gear donations in exchange for reviews. If I get anything from this, it’s because you decided to tip me.

I don’t want any followers. There will also never be a single sentence written by a machine on this website. Except for basic spellcheck, there will never be a single sentence edited by a machine either. It’s just me: no nonsense, no algorithm. If I’m wrong about something, contact me and I’ll do my best to fix the error.

By having these guardrails in place, I will be able to provide you the most unbiased advice possible. This advice is intended mainly for beginners, otherwise, maybe you could consider this ‘refresher training.’ I can’t teach you everything from the ground-up, but if you need quick and reliable answers, I hope you find it useful.

One more thing: I won’t write about anything I don’t know enough about. Regarding canoeing, kayaking, mountain biking, alpine climbing, cross-country-skiing, and trail running, please check out alternate resources.

Wherever you’re going, have fun out there. And get home safe!

Latest updates

2026-07-17: Sitemap added. Hyperlinks will be added to the sitemap over time.

Sitemap

  1. Introduction
  2. The ten essentials: Description and recommendations
  3. The ten essentials (plus two more essentials): Recommendations
  4. The ‘big four’
  5. The big four: Recommendations
  6. The hiker’s clothing system
  7. Hiking apparel recommendations
  8. Hiking apparel recommendations: Beyond the basics
  9. Repair services
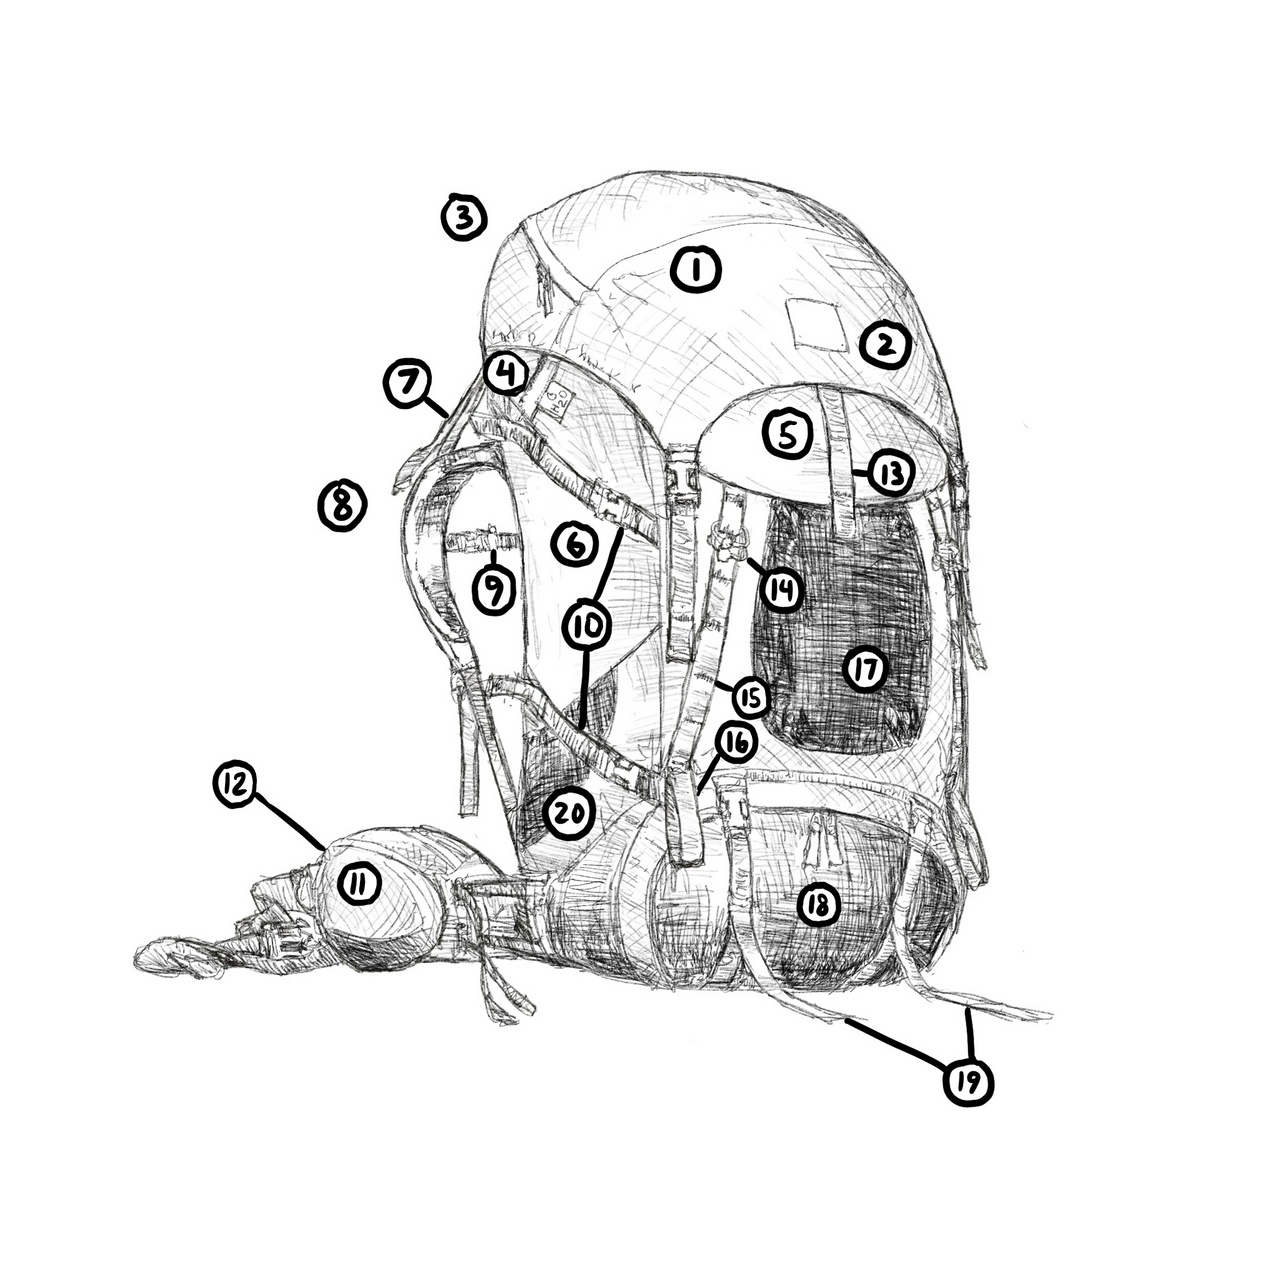
  10. Parts of a typical alpine-style backpacking pack/trekking backpack
  11. What makes ‘women’s fit’ backpacks different?
  12. Why doesn’t this ‘unisex fit’ backpack feel right?
  13. How should my backpack feel when I’m wearing it?
  14. Pack fitting in a nutshell
  15. What kinds of backpacks are there? Which one do I need?
  16. Technical sidebar: Backpack manufacturer design tendencies
  17. Technical sidebar: Why are backpacks so expensive?
  18. Hiking backpacks: Categorization
  19. Hiking backpacks: Recommendations
  20. How should my hiking shoes/boots fit?
  21. Hiking footwear: Recommendations
  22. Putting it all together: Complete 3-season backpacking packing checklist
  23. 3-season backpacking gear list: Recommendations
  24. How to travel with carry-on luggage only
  25. How to travel with carry-on luggage only: In a nutshell
  26. Carry-on and personal size limits for select airlines
  27. Carry-on and personal size limits for budget airlines
  28. Travel backpack recommendations
  29. Travel backpack recommendations, simplified
  30. Technical sidebar: Theft avoidance, deterrence, and recovery
  31. Technical sidebar: Photography tips for beginners
  32. Technical sidebar: Travel photography
  33. Technical sidebar: Nature photography
  34. Packing lists: Introduction
  35. Carry-on travel checklist with recommendations: Men’s version
  36. Carry-on travel checklist with recommendations: Women’s version
  37. Personal item checklist with recommendations: Women’s version
  38. Technical appendix A: Frequently Asked Questions, asked one time, by me, to myself
  39. Technical appendix B: Online resources and further reading
  40. What Alex uses
  41. What Alex can do for you

Not sure what you need for your adventure? Start here.

What: The Ten Essentials are a list of items that are highly recommended for safety in the backcountry and should always be packed in your hiking daypack. It was originally developed by The Mountaineers, a nonprofit organization dedicated to outdoor adventure based in the Pacific Northwest.

Where: The Mountaineering Ten Essentials are mandatory for your daypack if you plan on spending even a relatively short time in the mountains. But they’re also a good idea in any backcountry environment (I’ve added the +2 for hikers to bring back the “signalling” group from the older version of the list, plus bug protection for certain regions like Southern Ontario). By backcountry I mean areas that are significantly far from a parked vehicle, or anywhere that is separated from permanent human settlement. There is no specific distance threshold I have in mind. In theory and in practice, you could be within just a few kilometres of an urban environment and still be in the backcountry.

Ontario’s Crown Country has many obscure campsites that are a short distance from the road but would be considered backcountry. On the other hand, though there are many hikes that are more demanding but would still be frontcountry day hikes, such as the various hiking trails maintained by our various conservation authorities.

The basic definition, then, is that the backcountry is any wilderness location where you could get lost, that would result in sleeping overnight in the outdoors. It also includes any intentional overnight camping that is in the wilderness, excluding car camping.

Why: Therefore, you would take the Ten Essentials with you whenever there is a possibility that getting lost would mean you had to sleep overnight, under the stars. You won’t necessarily need them for hut-to-hut trips adjacent to urban areas, such as much of the Bruce Trail or the Camino, but it may be a good idea to bring them for hut-to-hut treks in the Alps or in the Sierra Nevadas. It’s not overkill, and as the search-and-rescue community always say, never underestimate the mountains. I found Tom Mahood’s volunteer search-and-rescue work instructive.

How: Hiking and camping skills are things that are better practiced than read about. I would encourage you to find community groups that support novice hikers. Consider taking a wilderness survival course or backcountry camping course for beginners.

This advice may come off as unnecessarily risk-adverse, especially to any experienced outdoorsmen reading this. If you have confidence in your own skills, then there is of course no need to take with you what doesn’t work. However, overconfidence is usually what causes experienced outdoorsmen to encounter a survival situation.

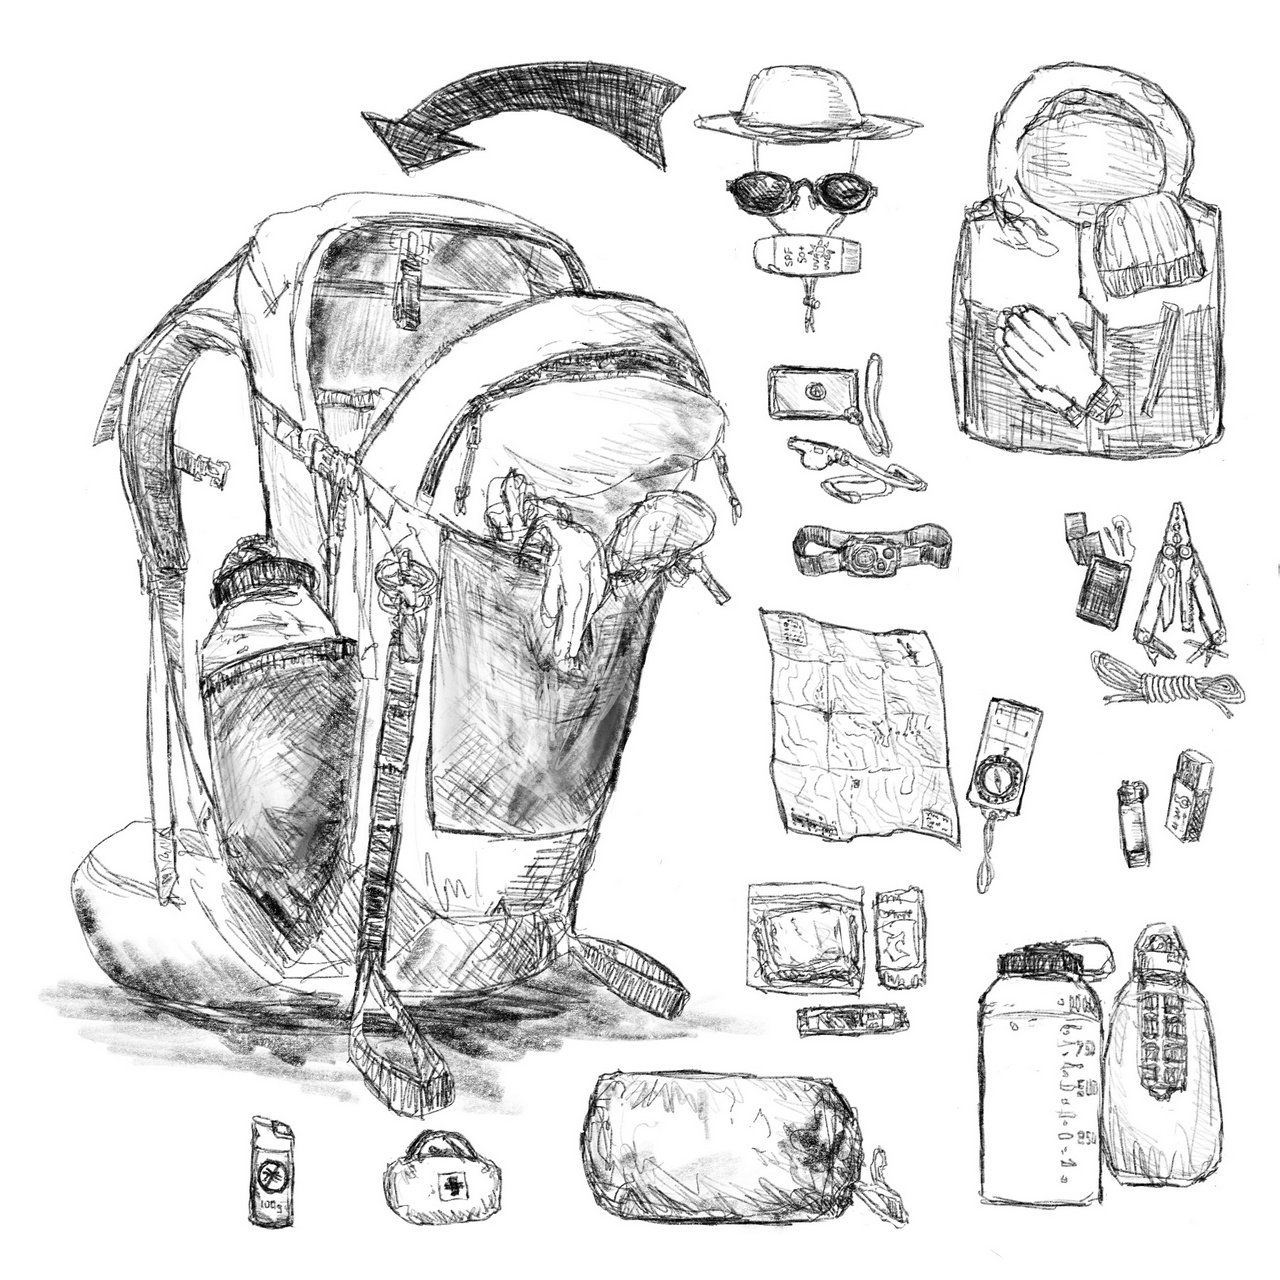
This list was originally created by The Mountaineers, and I've added a few things here. Not all of this is necessary in the frontcountry, and not all of this is needed at all times of the year, but when in doubt, err on the side of caution. This should all easily fit inside a 20L hiking daypack.

  1. Navigation: map, compass, GPS.
  2. Lighting: headlamp.
  3. Sun protection: sun hat, sunglasses, and sunscreen.
  4. First aid kit: add foot care and insect bite treatment wipes, if needed.
  5. Repair kit: small Swiss Army-style knife or folding multitool, adhesive patch kit.
  6. Fire kit: lighter, weatherproof matches, or a firestarter like a flint-and-steel.
  7. Emergency shelter: emergency bivy sack.
  8. Extra food: extra energy bar for ½-day hike, ½-day of extra food for a day hike, 1 day of extra food for multiday hike.
  9. Extra water: more water than usual, water purifier or treatment tablets
  10. Insulating clothing: puffy jacket, rain shell jacket.
  11. Signalling: emergency whistle, signalling mirror, signal beacon (for remote locations).
  12. Bug protection: bug shirt or headnet and bug repellent spray, if needed.

Recommendations

  1. Navigation: topographical map, Suunto A-10 NH, Garmin eTrex Solar
  2. Lighting: Petzl Tikka or Black Diamond Deploy 325
  3. Sun protection: Outdoor Research Sun Runner Cap or Outdoor Research Helios
  4. First aid kit: Adventure Medical Kits Hiker or Ultralight/Watertight .5
  5. Repair kit: Victorinox Classic ‘Swiss Army’ knife, Patagonia Field Repair Kit
  6. Fire kit: Bic lighter (the most reliable option!), UCO Stormproof Match Kit, Survive Outdoors Longer Tinder-Quik
  7. Emergency shelter: Survive Outdoors Longer Escape Lite Bivy
  8. Extra food: energy-dense, high-calorie snacks (e.g. trail mix)
  9. Extra water: more water than usual, Aquatabs, Katadyn BeFree AC 1L
  10. Insulating clothing: MEC Northern Lite or Patagonia Nano Puff insulated jacket (or REI equivalent), MEC x AQUANATOR or Patagonia Torrentshell 3L rain shell jacket (or REI equivalent)
  11. Signalling: Fox 40 Mini whistle, Survive Outdoors Longer Rescue Flash mirror, SOS beacon-equipped Apple iPhone 14 or later
  12. Bug protection: The Original Bug Shirt Company Original Bug Shirt, Natrapel 37mL

Simpler solution: just throw the Survive Outdoors Longer Scout Survival Kit into your backpack and make sure your water bottle is full before you head out.

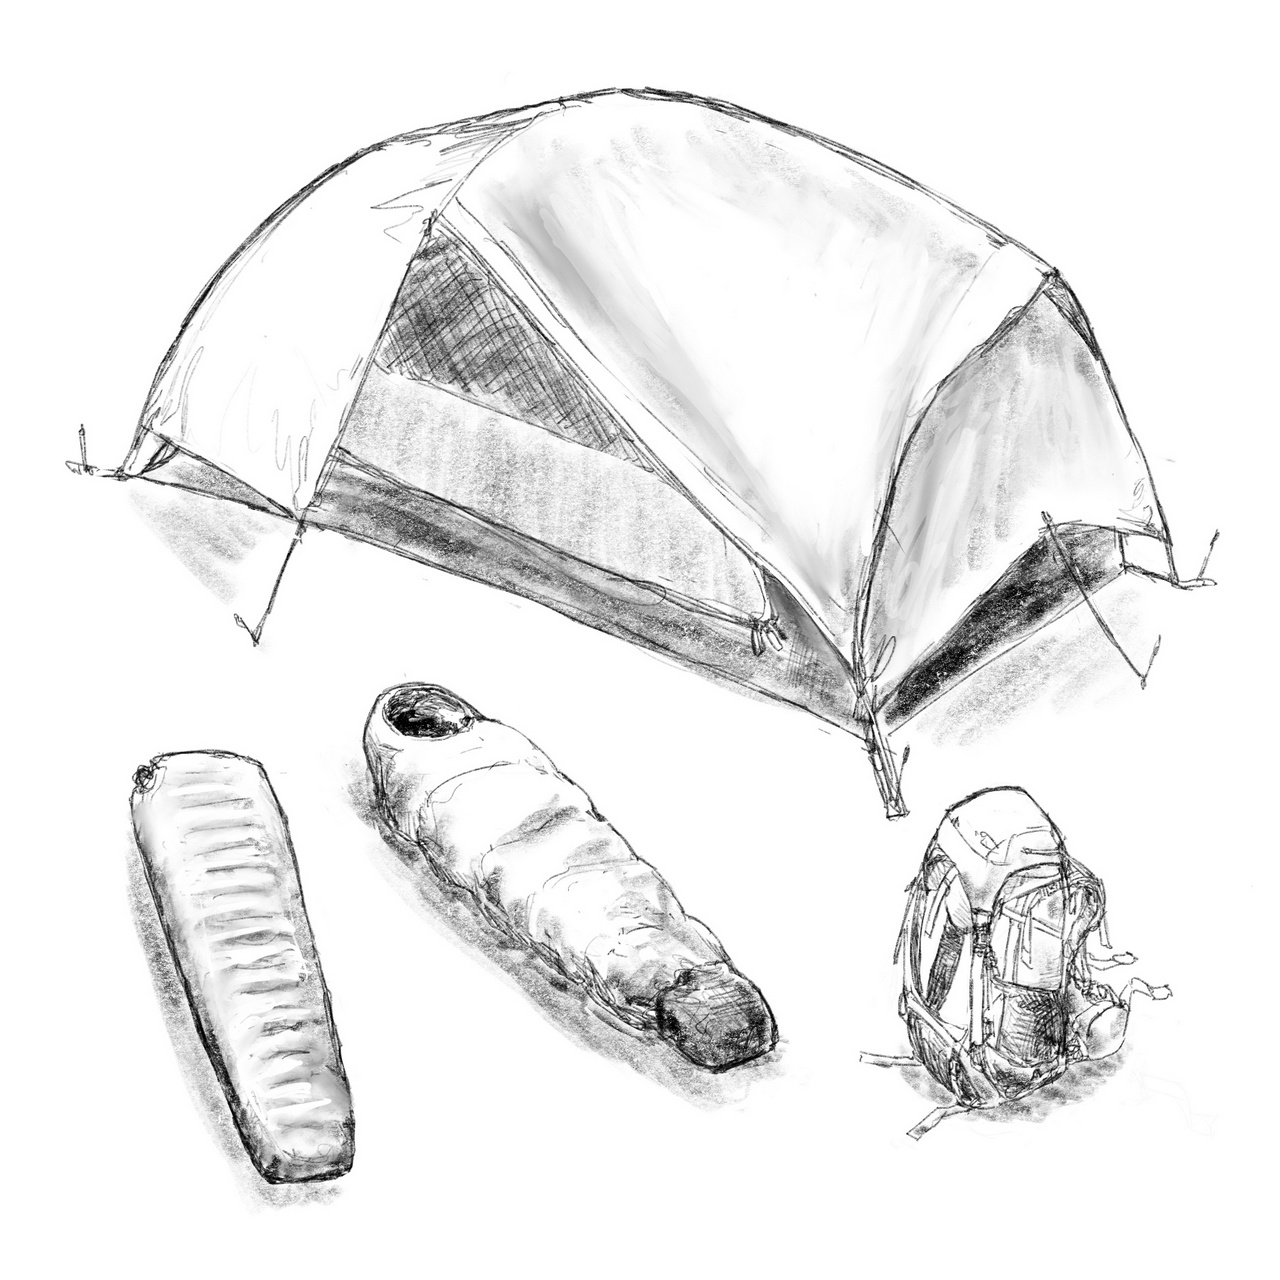
If you’re building out your kit from square one, start here. Your backcountry hiking kit should include the following core components:

  1. Shelter: Someplace to sleep in, e.g., a tent, tarp and bivy, or hammock. Most tents nowadays are double-walled tents, which means they are composed of an inner tent with mesh walls for ventilation, and an outer tent fly to block wind and rain from entering the mesh. This design is easy in setup, versatile in the kinds of terrain and weather it can handle, and helps move condensation away from your body and your sleeping bag. In places such as the eastern forests of North America, hammocks can be very pleasant to sleep in during summer. During winter and in high alpine environments, a bivy or a single-walled tent may be the best option.
  2. Sleeping bag: Something to keep you warm while you sleep, rated between 2C to -10C for 3-season conditions (i.e. in temperate climates, late spring, summer, and early fall), or lower than -15C for 4-season (i.e. winter or high alpine) conditions. The insulation is composed of either of down fill, which is lighter and packs smaller for its temperature rating, or synthetic fill, which is bulkier and heavier but can maintain some insulating properties if it gets wet.
  3. Sleeping pad: Something to sleep on top of, with an R-value between 2.7-4.5 for 3-season, or equal to or higher than 5.0 for 4-season. If you don't use a sleeping pad, the insulation will be less effective, as the insulating material beneath your body will be compressed by your body's weight. This will cause the heat of your body to be conducted into the ground. Some people swear by 'egg crate' closed-cell foam pads because they are inexpensive, indestructible, foolproof, and multipurpose. Air-inflatable pads types are usually preferred nowadays because they are warmer and vastly more comfortable.
  4. Backpacking pack/trekking backpack: Something to carry all your stuff, with a capacity rating of 50-70L for 3-season, or 75-95L for 4-season. There used to be various different internal frame and external frame backpacks to choose from, but nowadays there's only a single model still in mass production. It may be a good option for people carrying awkward, bulky older gear. Otherwise, internal frame backpacks are lighter and more comfortable, and you can buy them more easily. The frame is usually a perimeter spring steel frame that transfers the majority of the weight of the pack and its contents to your hipbones via a padded hipbelt. It should be fitted properly to your body, and given the same level of consideration as your hitting your hiking boots.

Budget recommendations, 3-season

  1. MEC Camper 2, MEC Volt 2, REI Half Dome 2
  2. MEC Centaurus -9C, REI Trailmade 25
  3. Therm-a-Rest Z Lite Sol, MEC Reactor 4, REI Campwell
  4. MEC Vista 65, MEC Zephyr 65, Gregory Stout 55/Amber 54, REI Trailmade 60

Optimized recommendations, 3-season

  1. MSR Hubba Hubba LT 2, MEC Spark UL 2
  2. Mountain Hardwear Bishop Pass 0C, MEC Draco/Delphinus -9C
  3. Therm-a-Rest NeoAir XLite NXT, Nemo Tensor, Big Agnes Divide
  4. Osprey Atmos/Aura AG 65, Gregory Baltoro 65/Deva 60, Deuter Aircontact Core 60+10/55+10 SL, Sierra Designs Flex Capacitor 40-60

Budget ultralight recommendations, 3-season

  1. MEC Spark UL 1
  2. MEC Aphelion UL -7C, MEC Talon 0C quilt
  3. MEC VectAir Ultralight 4
  4. MEC x SERRATUS Pace UL 40 (difficult to use normal water bottles)

Optimized ultralight recommendations, 3-season

  1. Big Agnes Copper Spur UL 2, MEC Alpha 1 UL
  2. Western Mountaineering Flylite 2C, Enlightened Equipment Revelation -1C quilt, MEC Delta Pivot -2C
  3. Therm-a-Rest NeoAir XLite NXT, MEC Bravo 6 UL
  4. Black Diamond Beta Light 45, Gossamer Gear Mariposa 60, MEC Charlie 32 UL

Budget recommendations, 4-season

  1. MEC TGV 2
  2. MEC Talon -17C
  3. MEC VectAir SL Xtreme 6
  4. Black Diamond Mission 75

Professional guide recommendations, 4-season

  1. Rab Latok Summit 2, Black Diamond Fitzroy 2, Hilleburg Jannu 2
  2. Mountain Hardwear Phantom -18C, Western Mountaineering Kodiak MF -18C
  3. Therm-a-Rest NeoAir XTherm NXT MAX
  4. Osprey Aether/Ariel Pro 75, Gregory Baltoro/Deva Pro 85, Cold Cold World Chaos 66/70

Note: If two backpacks are listed from the same company with a slash in the model name, the first is 'men's fit,' and the second is 'women's fit.' If there is only a single model name, it is 'unisex fit,' and may not fit well on the smaller women or larger men.

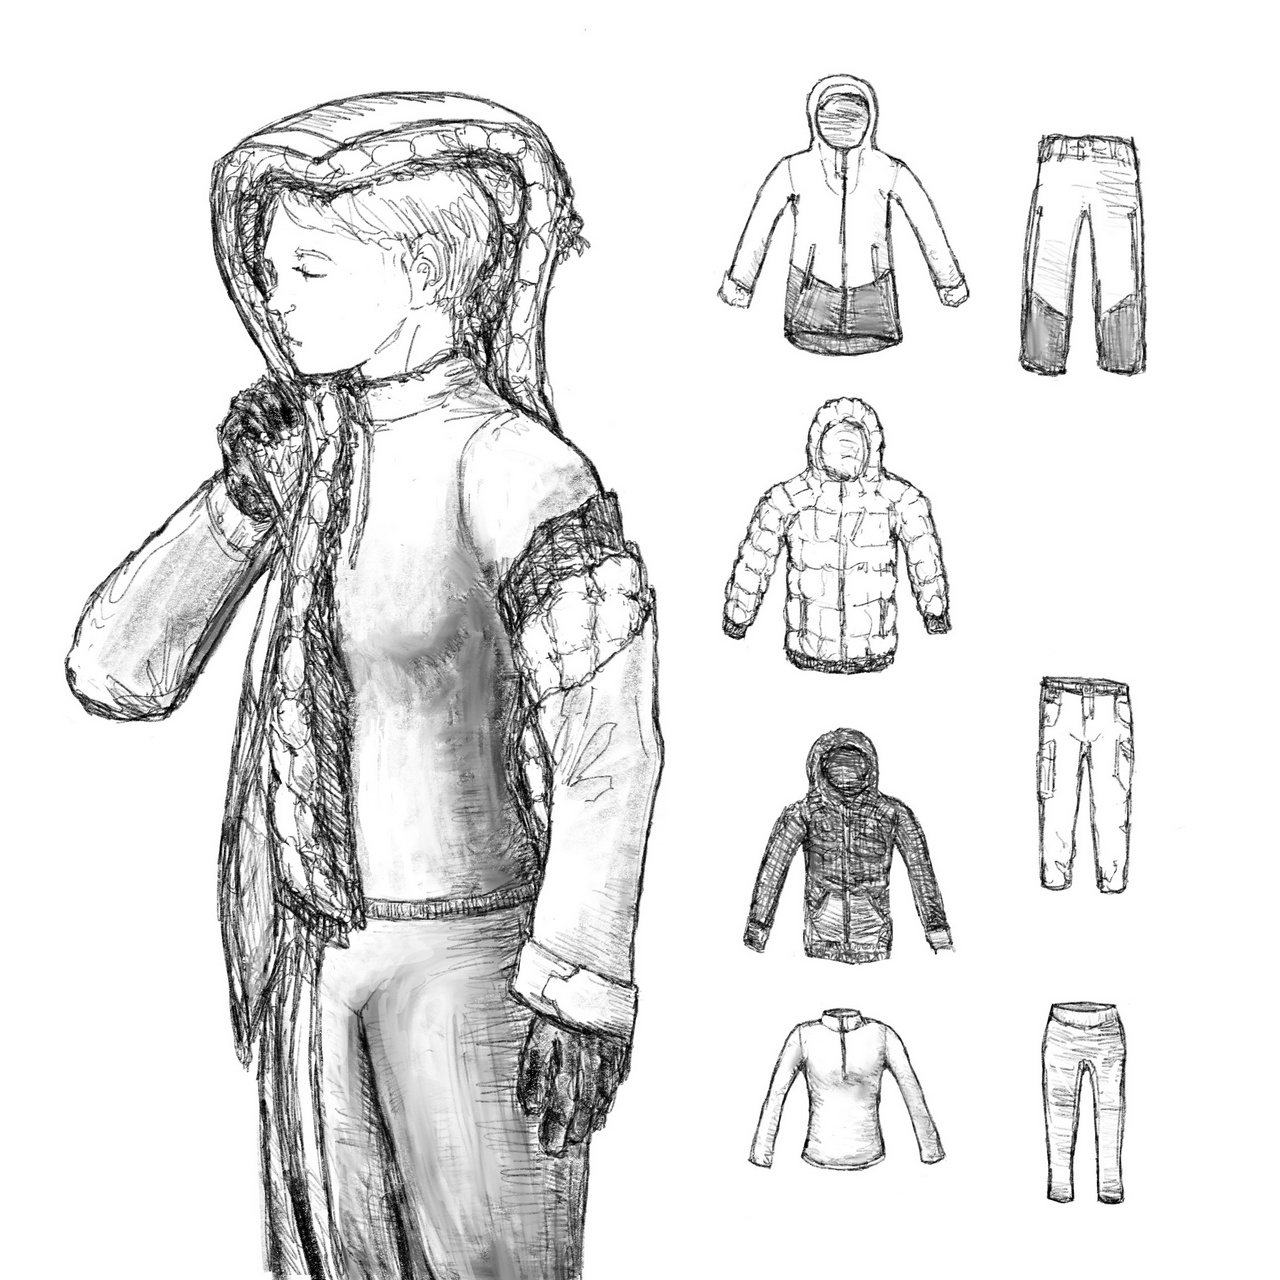
This layering system works best in the temperate zones of North America, South America, Europe, and Northeast Asia, during the peak hiking seasons from late spring to mid fall. Protecting yourself from the elements is about managing temperature and moisture, both from precipitation from the outside and sweating from the inside. This is why we recommend thin layers that can be taken on or off as needed. On a cold morning, start off with few layers, heating up as you exert yourself. When you stop to eat, rest, or make camp, put more layers on as you cool down and your sweat evaporates.

Remember: Cotton kills! Cotton absorbs and retains moisture, making it useful for jungles, but it should never be worn in the mountain or during winters in the backcountry, where hypothermia may be a risk.

  1. Base layers (“long johns”) and/or underwear: ¼-zip top and leggings, both made of merino wool blend or technical polyester (fleecy fabric, sometimes with a gridded pattern on the body-facing side). You may choose to wear underwear beneath your base layers for comfort, or normal athletic underwear without base layers in warmer temperatures.
  2. Sun protection clothing: thin, breathable sun hoody or a collared, button-up long-sleeved hiking shirt for the top, and Nylon hiking pants or joggers for your bottoms. On very hot days where you can only tolerate short sleeved or tank tops and shorts, you must wear a sun hat and apply sunscreen to exposed skin. Even if it’s cloudy, you may get sunburned on glaciers and snowpacks (where the Sun is reflected at you from most surfaces), very high elevations, or areas close to the Equator.
  3. Micro fleece jacket: technical polyester fleece hoody with ¼-zip or full zip opening. Not windproof.
  4. Insulated puffy jacket: synthetic fill for wetter, warmer days; down fill for dryer, colder days. Usually windproof and coated in durable water repellency or DWR to resist light drizzle and short periods of moderate rain.
  5. Rain shell: rain jacket with waterproof-breathable membrane. Always windproof. Additionally, bring rain pants for the mountains. In hot climates, a poncho may work better.

Additionally, you should bring:

  1. Gloves: At least a fleece liner glove, but possibly additional layers if it’s very cold. This may include an insulating mitt and a waterproof shell mitt for the most extreme conditions.
  2. Insulating hat: A merino wool or fleece beanie, toque, or other kind of insulating hat. However, if most of your other layers have hoods, this is unnecessary. Bonus: you can't lose your hat if it's permanently attached.
  3. Socks: Merino wool blend only. Ankle, quarter, or crew cut depending on personal preference, type of footwear, and weather. If you’re vulnerable to blisters and/or maceration, consider also wearing a liner sock underneath.
  4. Footwear will be covered in a separate article.

Enter your email to subscribe to updates.